How to download and install the COZYROC SSIS+ Components Suite
How to download and install the COZYROC SSIS+ Components Suite
Your computer must have the following minimum requirements in order
to use the COZYROC
SSIS+ Components Suite:
Operating Systems
- Windows
10 version 1507 or higher: Home, Professional, Education, and
Enterprise (LTSC and S are not supported)
- Windows
Server 2016: Standard and Datacenter
- Windows
8.1 (with Update 2919355): Core, Professional, and Enterprise
- Windows
Server 2012 R2 (with Update 2919355): Essentials, Standard,
Datacenter
- Windows 7
SP1 (with latest Windows Updates): Home Premium, Professional,
Enterprise, Ultimate
Hardware
- 1.8 GHz
or faster processor. Dual-core or better recommended
- 2 GB of
RAM; 4 GB of RAM recommended (2.5 GB minimum if running on a
virtual machine)
- Hard disk
space: up to 130 GB of available space, depending on features
installed; typical installations require 20-50 GB of free space.
- Hard disk
speed: to improve performance, install Windows and Visual Studio
on a solid state drive (SSD).
- Video
card that supports a minimum display resolution of 720p (1280 by
720); Visual Studio will work best at a resolution of WXGA (1366
by 768) or higher.
.NET Framework
SQL Server Version
SSIS+ 2.1
SSIS+ 2.2
SSIS+ 2.3
2012
v4.0
v4.6.1
v4.6.1
2014
v4.0
v4.6.1
v4.6.1
2016
v4.0
v4.6.1
v4.6.1
2017
v4.5
v4.6.1
v4.6.1
2019
v4.6.2
v4.6.2
v4.6.2
2022
v4.7.2
v4.7.2
v4.7.2
2025
—
v4.7.2
v4.7.2
Steps:
- First go to https://www.cozyroc.com/download and fill out the form. You will receive by email a link to a page where all versions of COZYROC are available for download. After confirming which version of COZYROC to download based on the Compatibility Charts in the Installation and Getting Started documentation, download the COZYROC SSIS+ Components Suite, by clicking on the link for the 32bit or 64bit version you wish to use. You will see a prompt to save the **Windows Installer Package file (MSI) ** to your local drive. Save the file in your "Downloads" folder or wherever you choose.

- Right-Click on the MSI file and Select Install from
the drop down menu.
- After the Welcome dialog window appears for the Setup Wizard , Click on Next button.
 Setup Wizard
 - After reading through the End User License Agreement, Click the Checkbox to acknowledge that you accept the terms in the License Agreement and Click on the Next button to continue.
 Note: the Custom
Setup dialog window will appear, which
will allow you to specify what SQL Server versions you would
like to install.
Note: the Custom
Setup dialog window will appear, which
will allow you to specify what SQL Server versions you would
like to install. 
End-User License
- Click on the Next to continue. Note: the
installation confirmation dialog window will appear.

Custom Setup
- Click on the Install button.
- Afterward, Click the Yes button to allow changes to your computer. Note: the Setup
Wizard will then show the installation
progress status. When the installation is completed, the
status will then be updated.

Install Dialog Window
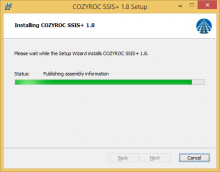 Installation Status
 - When the Setup Wizard is done with the installation, Click on the Finish button.
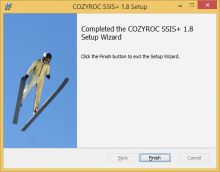 Installation Completed


 Note: the Custom
Setup dialog window will appear, which
will allow you to specify what SQL Server versions you would
like to install.
Note: the Custom
Setup dialog window will appear, which
will allow you to specify what SQL Server versions you would
like to install. 


Book a Success Call
Need Help?
Evaluating COZYROC? --> Success Call
Customers --> Submit a Ticket
Related Articles
What are the recommended steps for installation?
Review the information on the Installation and Getting Started page; the Compatibility Chart is especially important. This will ensure proper installation and configuration of your environment and ensure that the COZYROC SSIS+ Suite will work with ...Installation and Getting Started
Overview This article contains information to help ensure proper installation and configuration of your environment, but most importantly, ensure that COZYROC SSIS+ Suite will work with the installed components (e.g., SQL Server, SSDT). Although SSDT ...How to upgrade from SSIS+ versions older than v1.7 SR-2 to SSIS+ versions v1.7 SR-2 or newer.
Packages that include any COZYROC tasks or components and were created prior to SSIS+ version 1.7 SR-2 cannot be upgraded directly to version 1.8 or later. They must first be upgraded to SSIS+ v1.7 (SR-2). Microsoft made changes in Visual Studio and ...How to upgrade an existing COZYROC SSIS+ Suite installation to a higher version.
Before upgrading your existing COZYROC SSIS+ Suite to a higher version, we recommend that you first review this entire page in detail. Depending on your upgrade situation you may need to reference the Compatibility Charts on the Installation and ...Why do I not see the COZYROC components in the SSIS Toolbox in Visual Studio?
If you do not see the COZYROC SSIS+ components showing up in the SSIS Toolbox in Visual Studio then one of the following may be the reason they are not showing. 1. There is an incompatibility in your installation. You will want to insure by looking ...