C) Creating Records through an API (POST Requests)
Previous article: Reading Data from an API (GET Requests)
Step 1. You should now be proficient with setting up an Integration Services Project in Visual Studio and reading data from an API with CozyRoc SSIS+. You should have a REST Connection Manager connected to ClickUp (or your particular API service) in the bottom panel. Open the SSIS Toolbox panel on the left-hand side, create a Data Flow Task, and go to the Data Flow screen for that component.
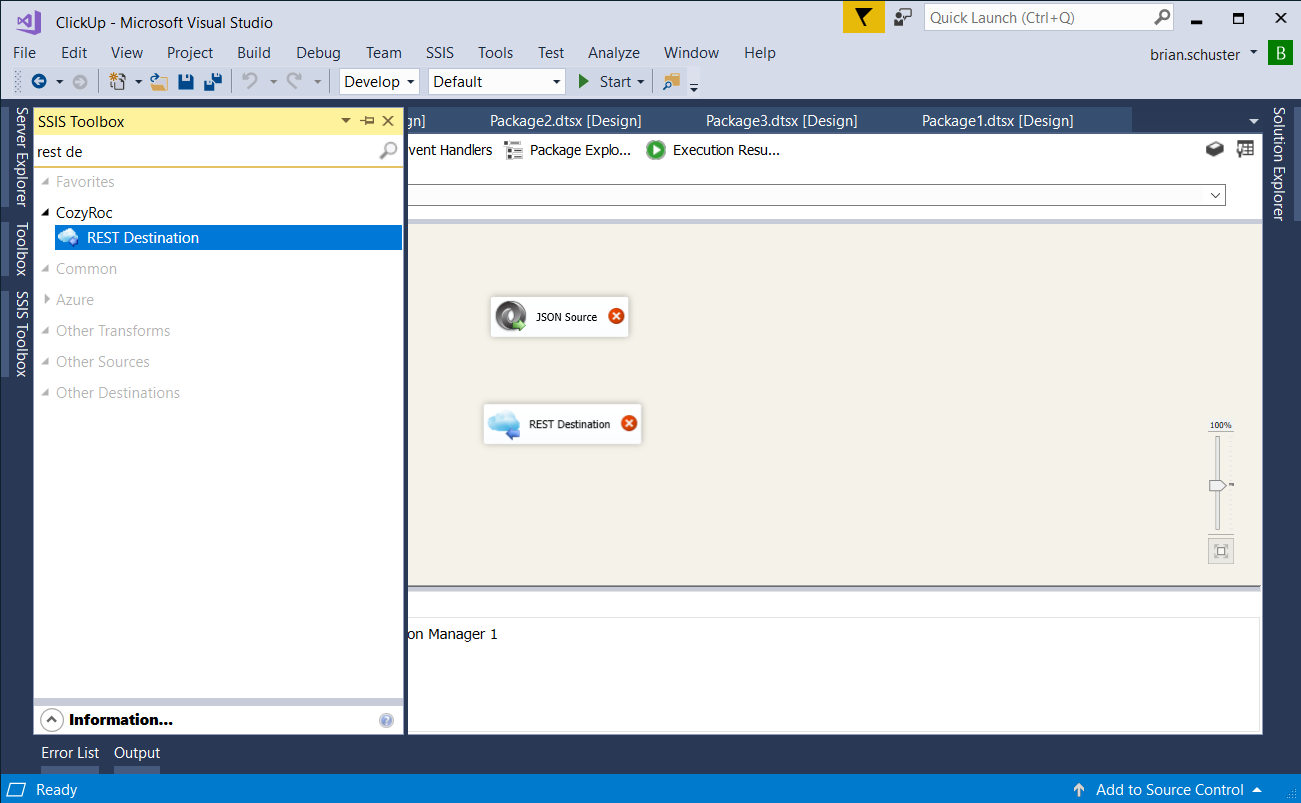
Step 2. Open the SSIS Toolbox and add two components, JSON Source and REST Destination, to the Data Flow screen. You will see a red "X" indicator on each new component because they are not yet configured.
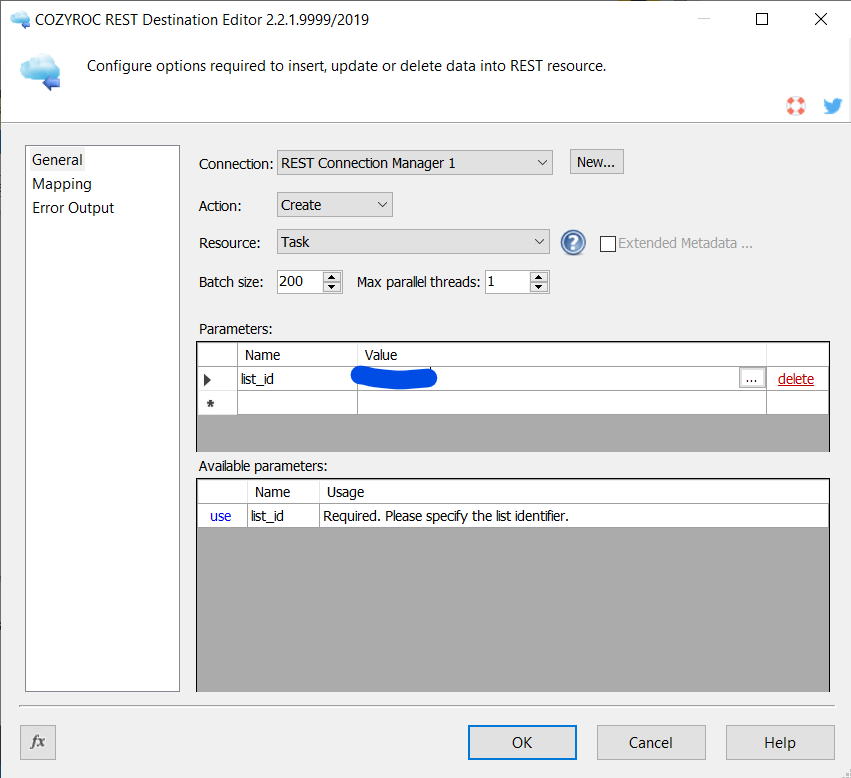
Step 3. Open the REST Destination component. Here you will select the connection manager you've created, define your action ("Create"), and select the resource. We're using the Task resource in ClickUp for this example. Batch size is not relevant for most "create" requests unless it is a batch-processing API. Specify the list identifier, list_id, for this example. As discussed in Reading Data from an API (GET Requests), you can use the end of the URL when viewing a list in the ClickUp browser UI.
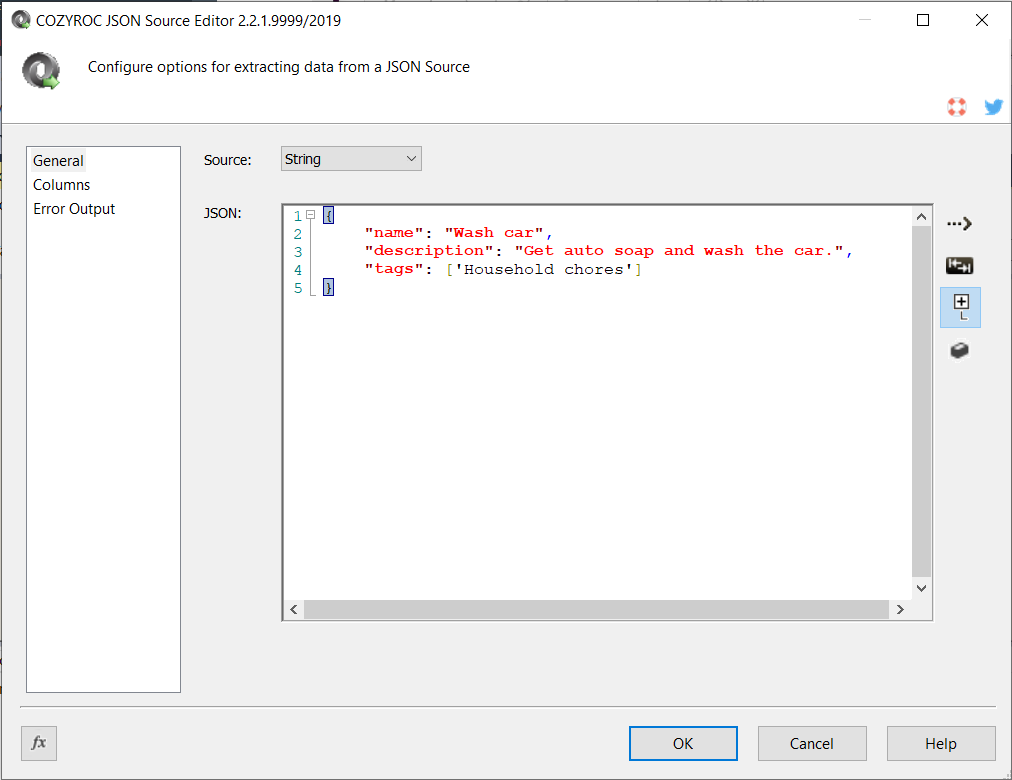
Step 4. Save the REST Destination Editor by clicking OK. You'll return to this later. Open up the JSON Source component to enter the JSON payload you'd like to send in the body of your POST request to ClickUp. This will contain the contents of the task entry for your to-do list. In the screenshot, you can see that I've entered the basic fields for a task to wash the car as a JavaScript object. See W3School's JSON reference for additional guidance.
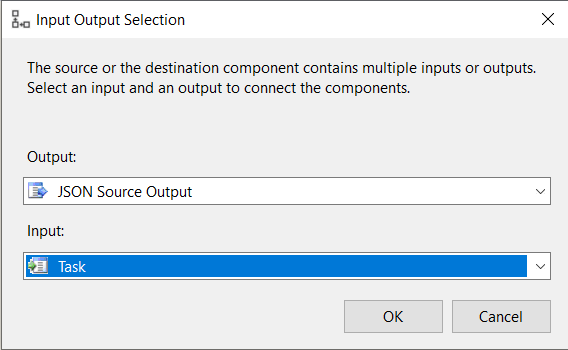
Step 5. Click OK and connect the JSON Source arrow to the REST Destination. In the Input Output Selection, select "JSON Source Output" as the output and "Task" as the input.
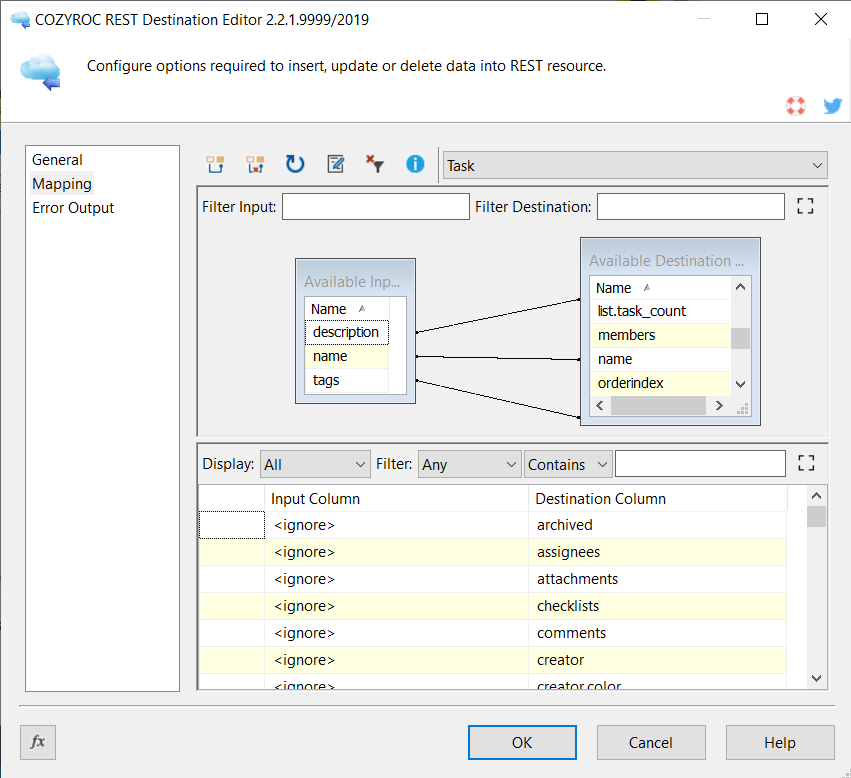
Step 6. Click OK and re-open the REST Destination editor. Now you can go to the Mapping tab. You should see that your three input fields (tag, name, and description) are automatically mapped to destination columns by the same name. These mappings are visible in the table at the bottom and the line-connector display at the top. Mapping provides you with some flexibility in how to write your JSON source data.
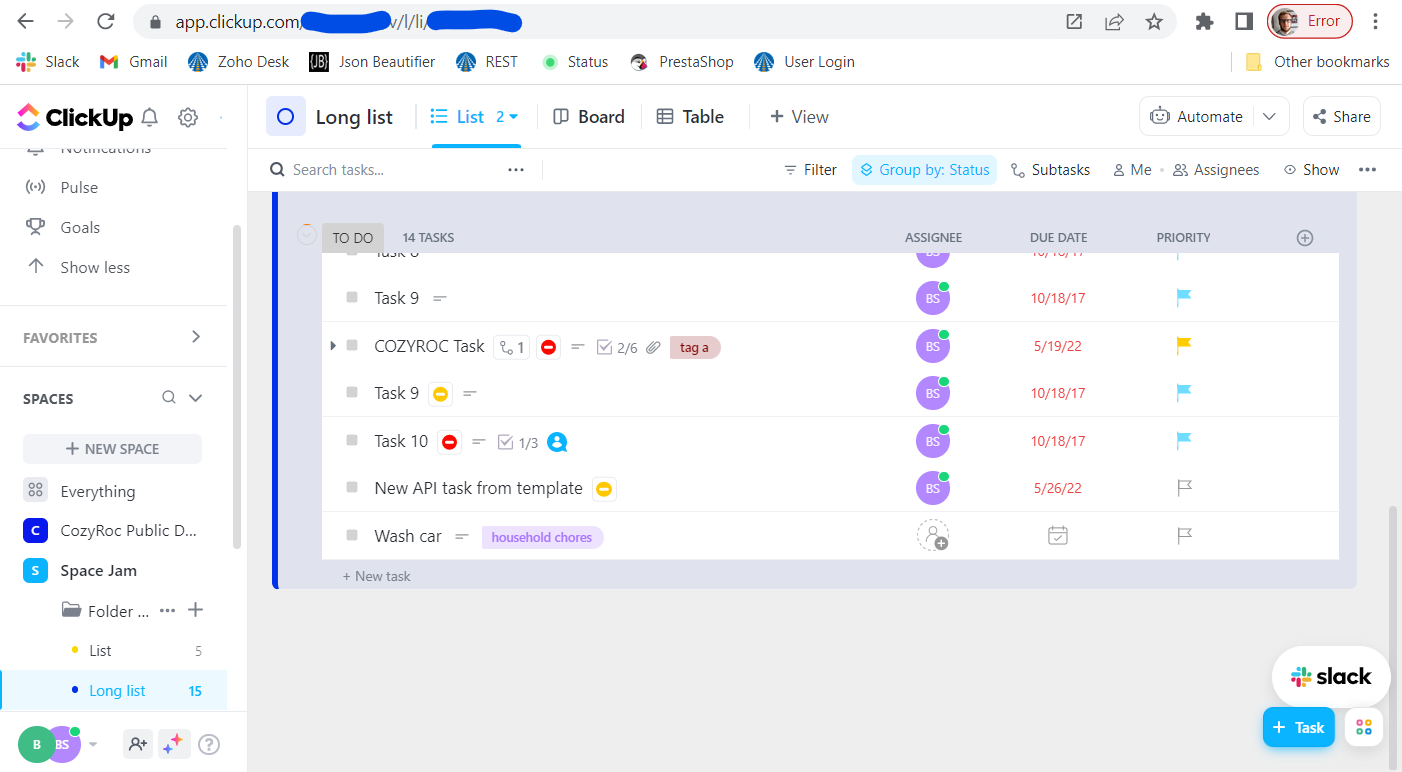
Step 7. For this step, we'll execute the task component to create a task item in ClickUp! Save your work and go to the Control Flow. Execute the task. After Visual Studio submits the request successfully, you should see a green checkmark on the component. If there's an error, you can see details toward the bottom of the Execution Results or Progress tab.
Next article: Updating Data through an API (PUT, PATCH Requests)
Book a Success Call
Related Articles
Getting Started with REST API Connections in CozyRoc SSIS+: Section Table of Contents
Guide table of contents: Guide to REST API Connections in CozyRoc SSIS+ Get acquainted with REST API connectors in CozyRoc SSIS+ so that you can integrate data sets and databases across web services and platforms. CozyRoc SSIS+ Components Suite is a ...Guide to REST API Connections in CozyRoc SSIS+: Table of Contents
Table of Contents I. Introduction II. Installing CozyRoc SSIS+ A) Installing Visual Studio and SSDT B) How to Download and Install the CozyRoc SSIS+ Components Suite C) Check Software Versions D) Licensing CozyRoc SSIS+ III. The Basics of SSIS+ IV. ...D) Updating Data through an API (PUT, PATCH Requests)
Section table of contents: Section Table of Contents Previous article: Creating Records through an API (POST Requests) Step 1. You can copy-paste the Data Flow Task component you've used to create a record for a resource or create a new one in the ...B) Reading Data from an API (GET Requests)
Section table of contents: Section Table of Contents Previous article: Configuring a REST Connection Manager In this article: Part 1: Listing Records Part 2: Composite Columns Part 1: Listing Records Step 1. Once you have created a REST Connection ...How can I retrieve updated and deleted Salesforce records?
You can use the following reusable script with the JavaScript component to retrieve records that were deleted from Salesforce between specified dates: https://www.cozyroc.com/ssis/script-salesforce-get-deleted-source To retrieve records that have ...